Issue
- How to clean the oven manually
Applies to
- Zanussi built-in single oven
Resolution
Note: The article describes cleaning an oven where the oven has no dedicated cleaning functionality such as Pyrolytic cleaning programmes. Please see the article link below for activating the Pyrolytic cleaning function on other ovens.
Zanussi Pyrolytic cleaning function
For manual cleaning, please follow the instructions below.
ALWAYS ENSURE THE OVEN IS COOL BEFORE CLEANING
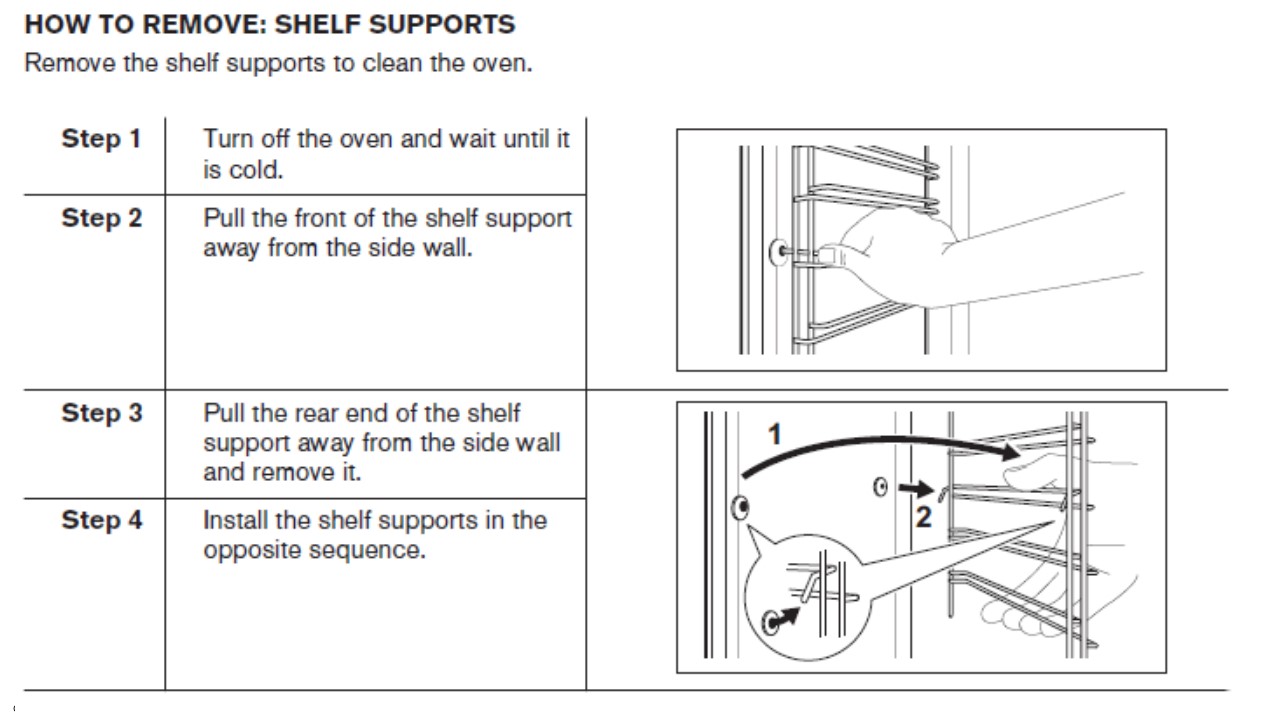
1. Remove oven trays, wire shelves and the pop-off shelf supports on each side and soak them in the sink or wash in the dishwasher.

2. When using oven cleaner sprays, spray the cleaner into a cloth and wipe the cavity as opposed to spraying it directly into the cavity itself. This can cause the cleaner to impact capillary cables behind the fan over time. Zanussi Oven and Micro Care is recommended for use on Zanussi ovens. Please follow the instructions on the pack provided. It's always advised to try a wet cloth on the oven before using any cleaning solution. Any cleaners used must be non-abrasive.
3. Wipe down the whole cavity and inner glass door.
4. Wipe dry.
5. Dry the stainless steel shelves, trays and shelf supports and return them to the oven.
6. On most models it is possible to remove the door glass and/or door.
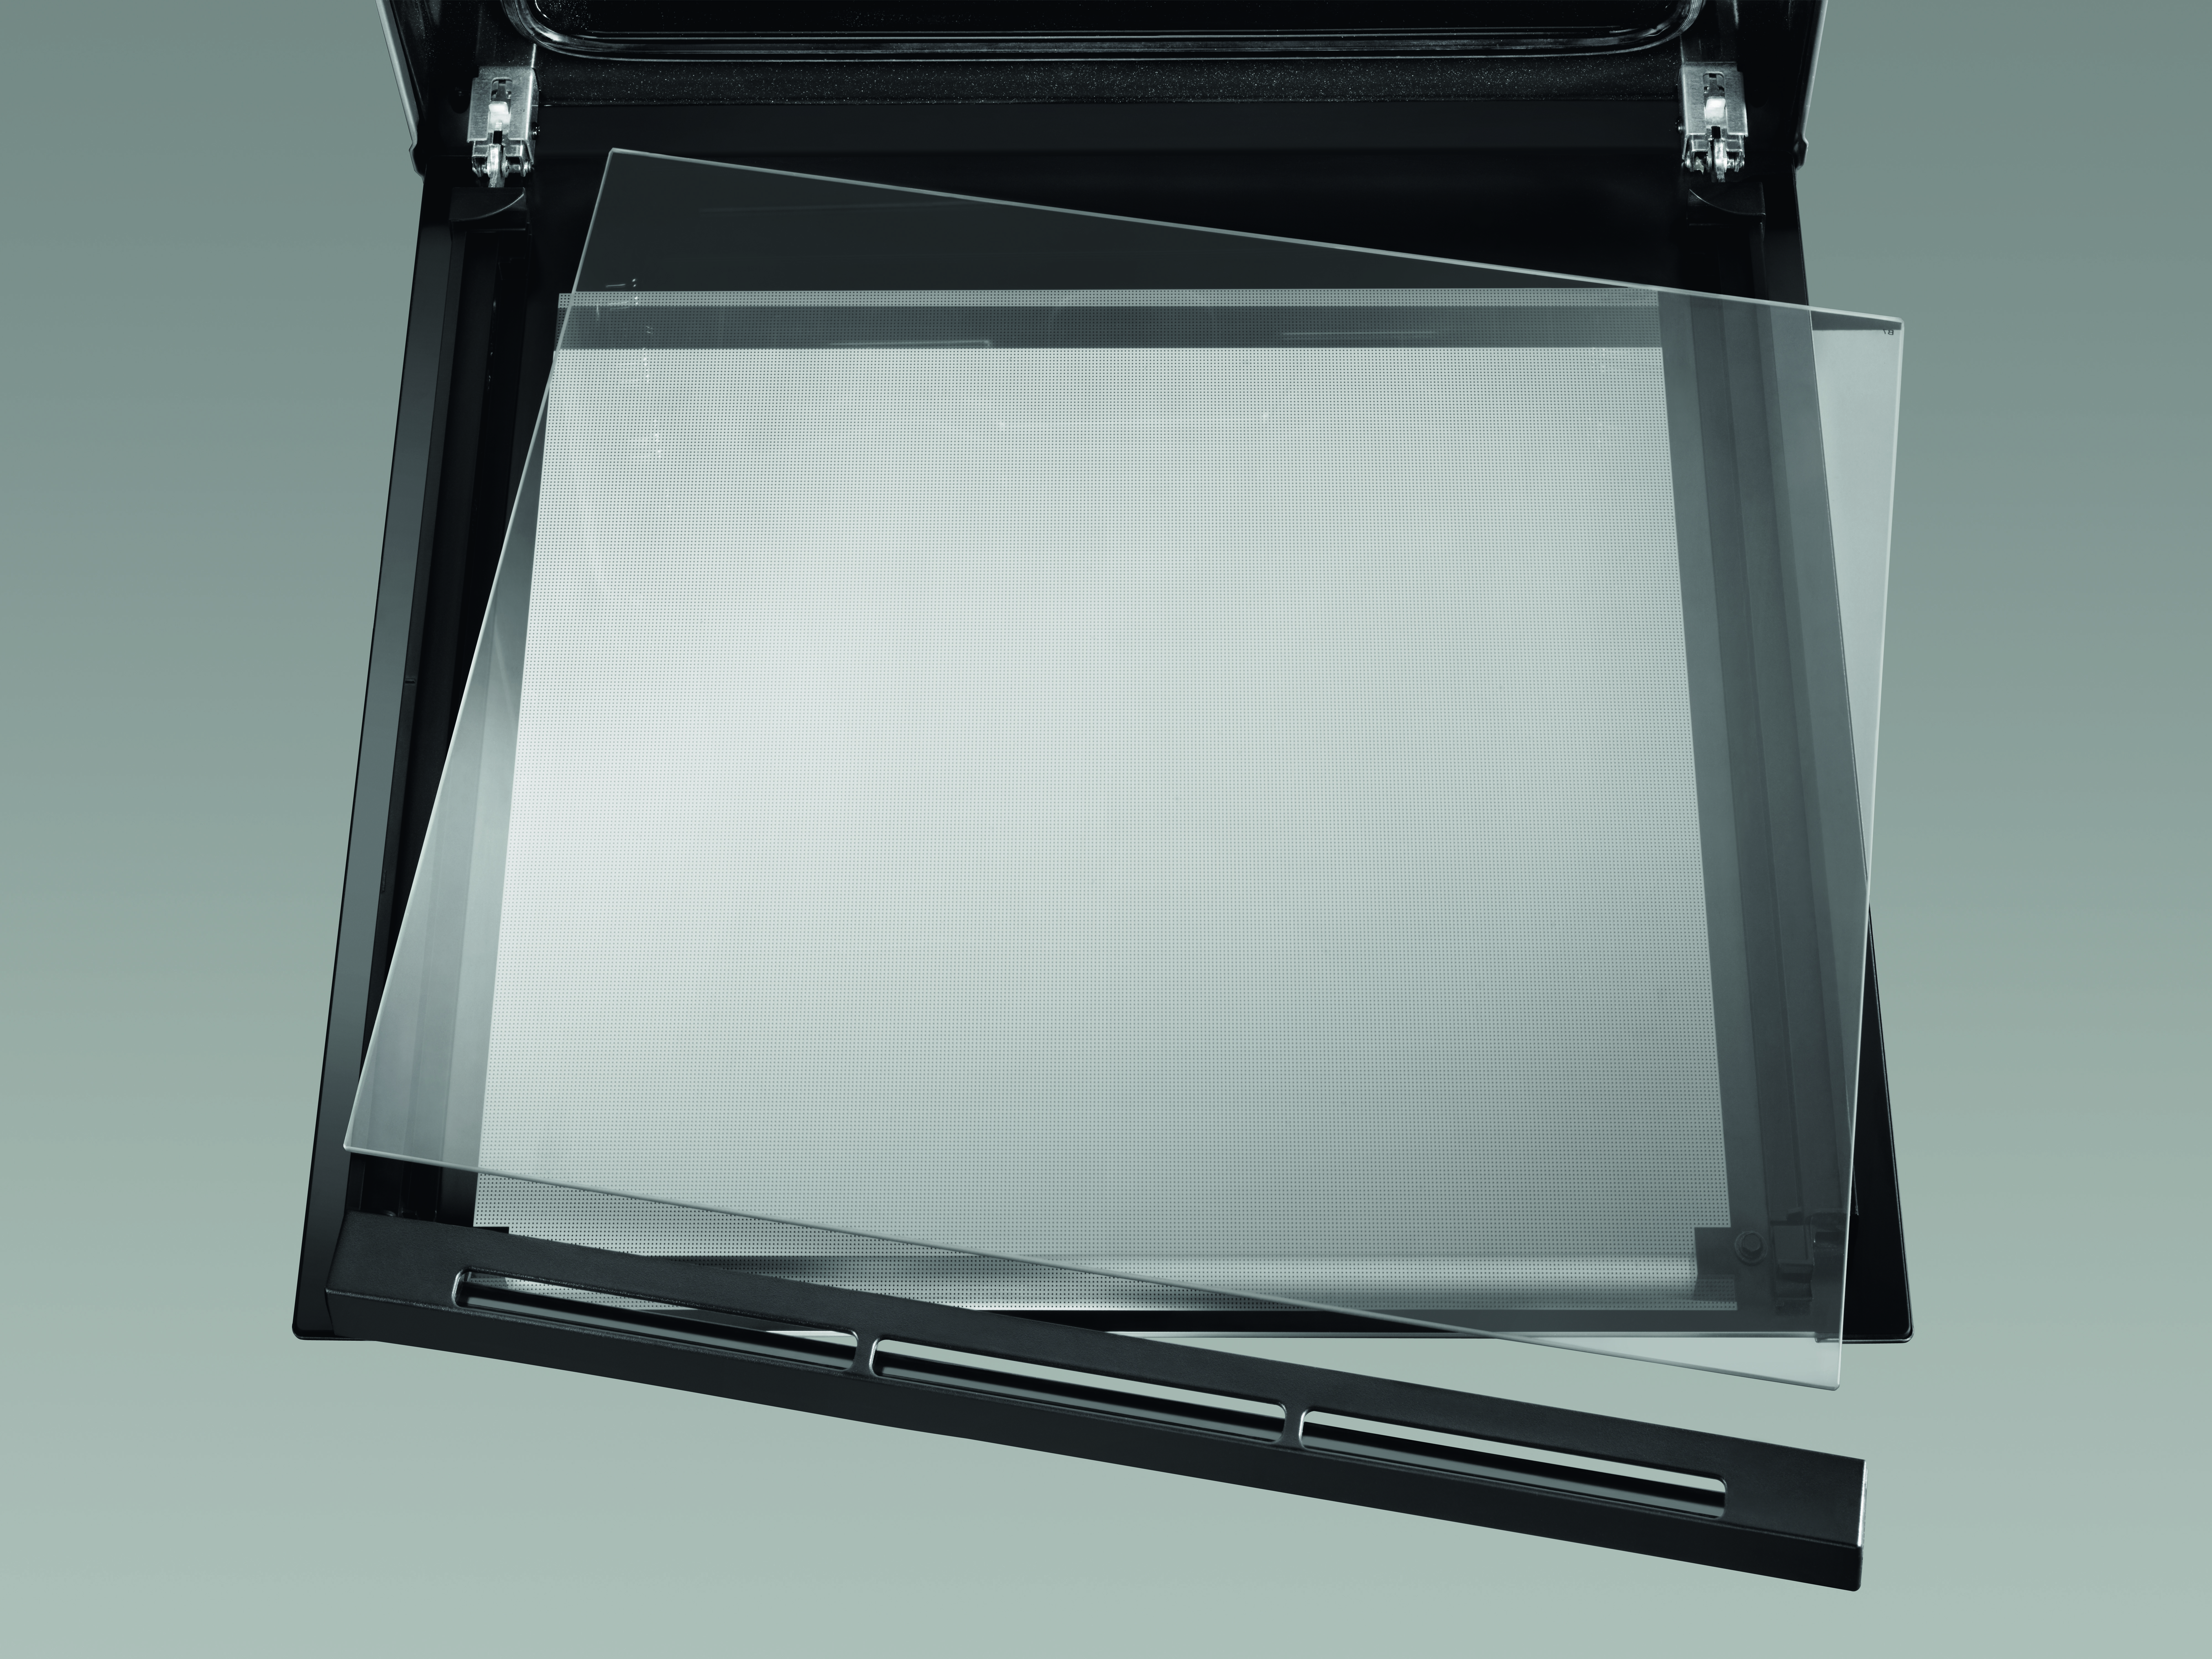
Glass is removed by releasing the plastic strip at the top of the oven door which secures the glass in place. Textured markings on either side of the plastic strip indicate where to apply pressure and a pull towards you. This will release the strip and give you access to the individual glass panes.


Carefully remove the glass panes and clean them with a wet cloth or use an oven cleaner for particularly stubborn food debris.
Return the glass to the fixings.
Replace the strip that secures the glass in place.
Removing the door is also possible on many integrated ovens.
Follow the instructions in the images below to remove the door from the oven. Repeat the instructions in reverse to put the door back on the oven.
Warning: The hinge is designed to hold the weight of the door and may spring back when the door is removed.
DO NOT cook or activate any cooking functions on the oven when either the glass panes or the whole door has been removed and only remove the glass panes or oven door when the oven is cool.

To Re-Attach the Door
For most Zanussi ovens the hinge arm remains attached to the door. It is usually a simple case of doing the above removal steps in reverse order.
If the hinge snaps back into the closed position after the door has been removed, the hinge arm will need to be leveraged to the open position.
This will require an adjustable spanner or some pliers.
Grip the hinge arm and carefully pull it open.

Ensure the hinge is locked in position with the locking toggle.
Slide the door back into place on the oven by using the removal method above but in reverse.
Ensure the door is fully seated before closing the levers.